Potter DIY: Wand
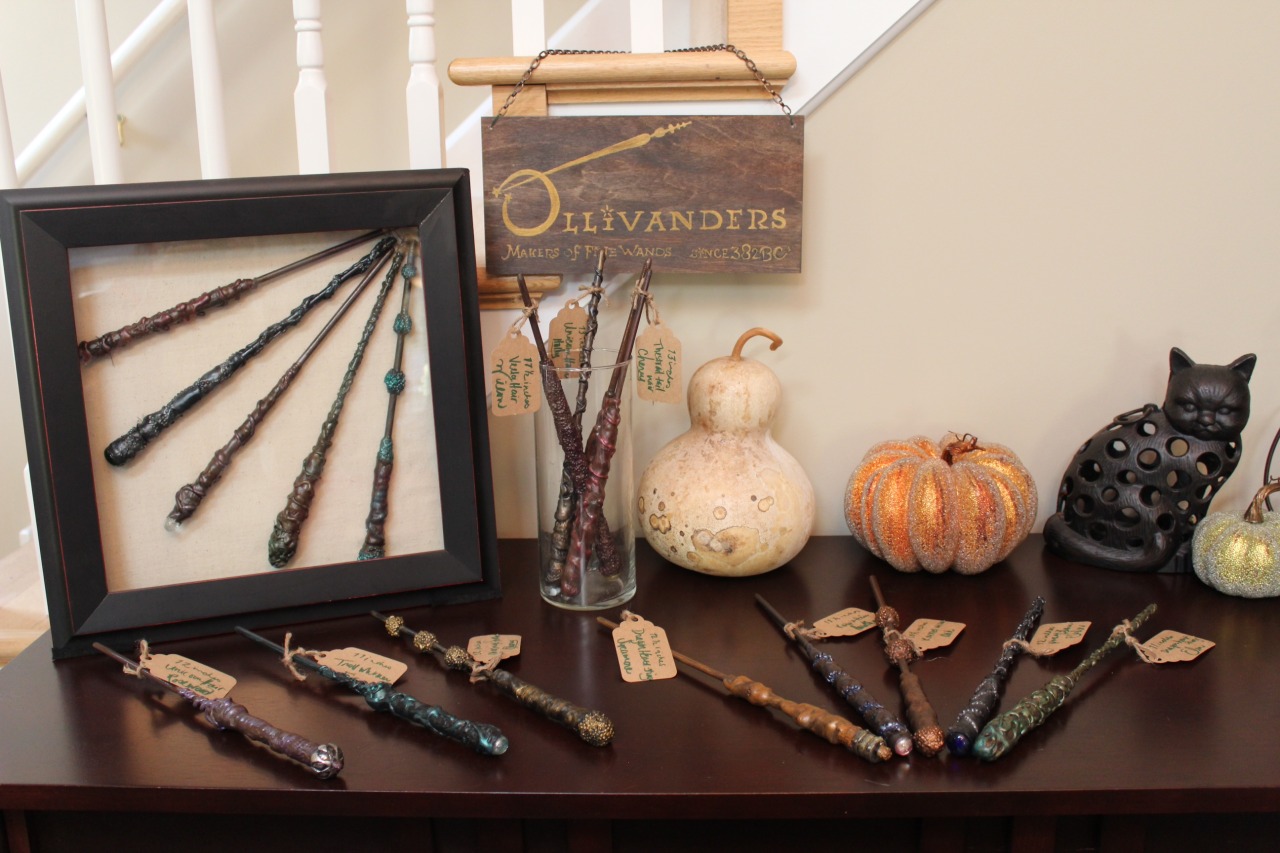
Everyone knows that one of the many coming-of-age rites of passage in the wizarding world is buying your first wand at the adolescent age of 11. And while the wand usually chooses the wizard, this fan-submitted DIY is going to show you how you can choose (or in this case, make) the wand. Wendy, a 30-something-year-old teacher, has been a fan of the Potter series ever since her best friend/college roommate convinced her to read “those kids’ books.” A person whose motto is “why buy when you can DIY” always has a desire to craft, cook, decorate, or entertain.
This Ravenclaw’s original inspiration to start creating her detailed wands came about a year ago when she threw an “epic 2-day Harry Potter movie marathon party” and wanted to give out party favors. After compiling ideas and tips from Pinterest, Wendy decided that she wanted to give each guest a different styled wand that would reflect their own personalities. Her unique and creative wands were such a hit with her guests and herself that she has continued to create them to this day and is now very excited to share her process with the fandom. In all, this project will take a day or two from start to finish due to all the drying time, and you will have 2–3 hours of active work.
What You’ll Need:
- Wooden dowel
- Sandpaper
- Hot glue gun and multiple glue gun sticks
- Bead or glass jewel (optional)
- Superflow and small fine glue gun nozzles (if you have them)
- Bowl of ice water
- Craft materials: twine, sequins, beads, pipe cleaners, glitter, feathers, leaves, etc. (optional)
- Mod Podge (optional)
- Black spray paint primer
- Any acrylic craft paint: black, brown(s), metallic, pearl, etc.
- Acrylic gloss sealer spray paint
Directions:
Step 1: Using the sandpaper, sand down and round out one end of the dowel (a birch wooden dowel around 12–13′′ is recommended) to create the tip of the wand.
Optional Step: Using the hot glue gun, glue your bead or glass jewel on the handle (bottom) end of the wand.
Step 2: Using the hot glue gun with a superflow nozzle, build up and form the glue to your desired handle thickness with 2–3 layers of hot glue. Let each layer dry before applying another. For the final layer, you need hot-but-not-too-hot glue to form/manipulate a fairly smooth handle, with your fingers if needed.
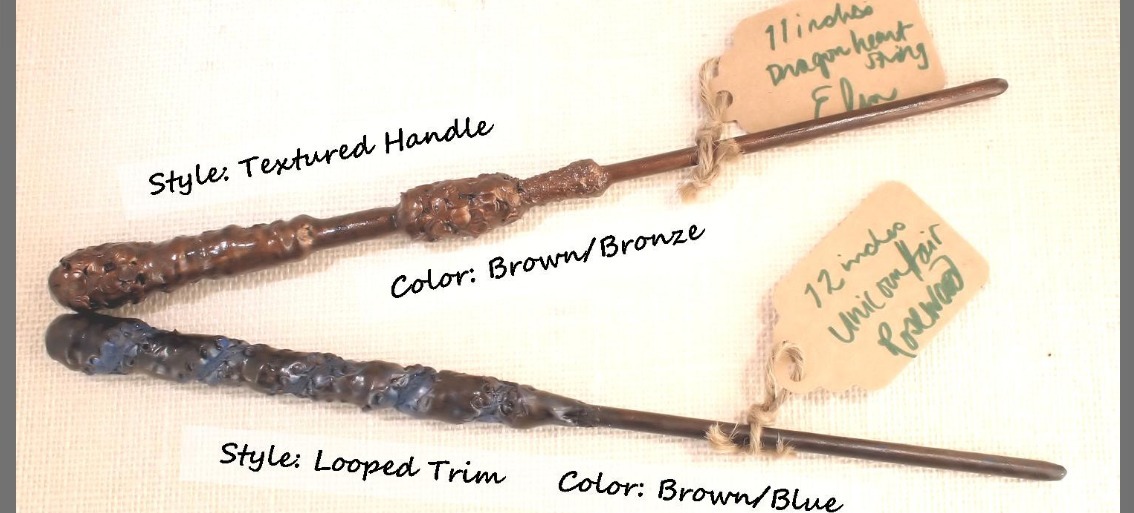
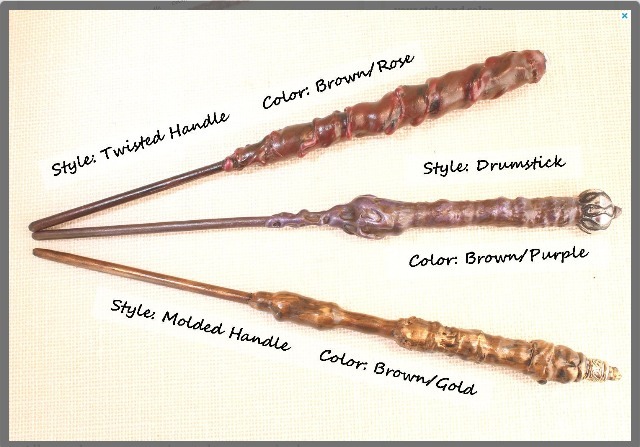
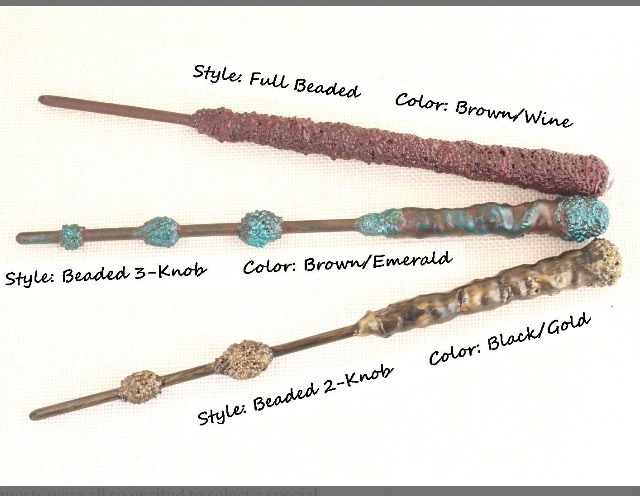
Step 3: With a small fine glue gun nozzle, you can try out two different methods of adding decorative details.
1. “Draw” lines, shapes, or designs on the wand with the glue gun. Draw on just the handle or the whole wand.
2. A more complicated “inlaying” method is to add decorative details to the wand while the glue is still hot. Place enough glue on the wand (use the ice water on your hands to ensure that the glue doesn’t stick to you), and then stick any craft materials you desire into the hot glue. To ensure that the materials do not fall off, paint over them with a layer of Mod Podge and let it dry overnight.
Step 4: Spray the wand with black spray paint primer. Once dried, apply your chosen base color (dark brown, black, etc.). After that has dried, add any other craft paint color(s) with a small paintbrush head to your accent designs. If you want to go for more of an authentic wood look, try brown or black. Or try out an interesting metallic or pearlized craft paint. When painting over black or dark-brown colors, the finished appearance of the accent color is usually darker or muted because the paint will dry darker than it appears when it’s wet.
Optional Step: Using the sandpaper, sand down any jagged area or bits you don’t like. You can always retouch with paint afterward, so do not worry about accidentally rubbing off any paint.
Step 5: In a well-ventilated area, apply an acrylic gloss sealer spray paint to add shine and a protective coating to your wand. It usually takes several passes with the primer and sealer before you’ll have the entire wand coated, and you’ll want to let each coat fully dry.
Grab a dueling partner and let the wand-waving begin. Make sure to tweet us your results. Go check out all our other craft, cosplay, and even holiday DIYs over in our Potter DIY section.


